 SearchChamp
Connect Webflow
Publish finished drafts straight into your Webflow CMS with a site API token.
Connecting Webflow makes your Webflow site a publish destination, so a finished draft goes from the Content Writer into your blog collection without a copy-paste round trip.
What you'll need
- A Webflow site API token with the scopes listed below.
- Your Webflow Site ID and the collection ID of your blog collection.
Steps
Create a site API token in Webflow
In Webflow, open your site's Site settings → Apps & integrations → API access and generate a site API token. Grant all six scopes SearchChamp needs:
sites:read · pages:read · pages:write · cms:read · cms:write · assets:write
assets:write is easy to miss and matters: without it the token authenticates fine, then every article that contains an image fails to publish. Articles include images by default.
Find your Site ID and blog collection ID
The Site ID is in your Webflow site settings. The blog collection ID is the CMS collection new articles are created in — Site settings → CMS → your blog collection → Settings.
Paste them into SearchChamp
Go to Site Settings → Integrations, find Webflow under Other platforms, and select Connect. Paste the token, Site ID, and blog collection ID.
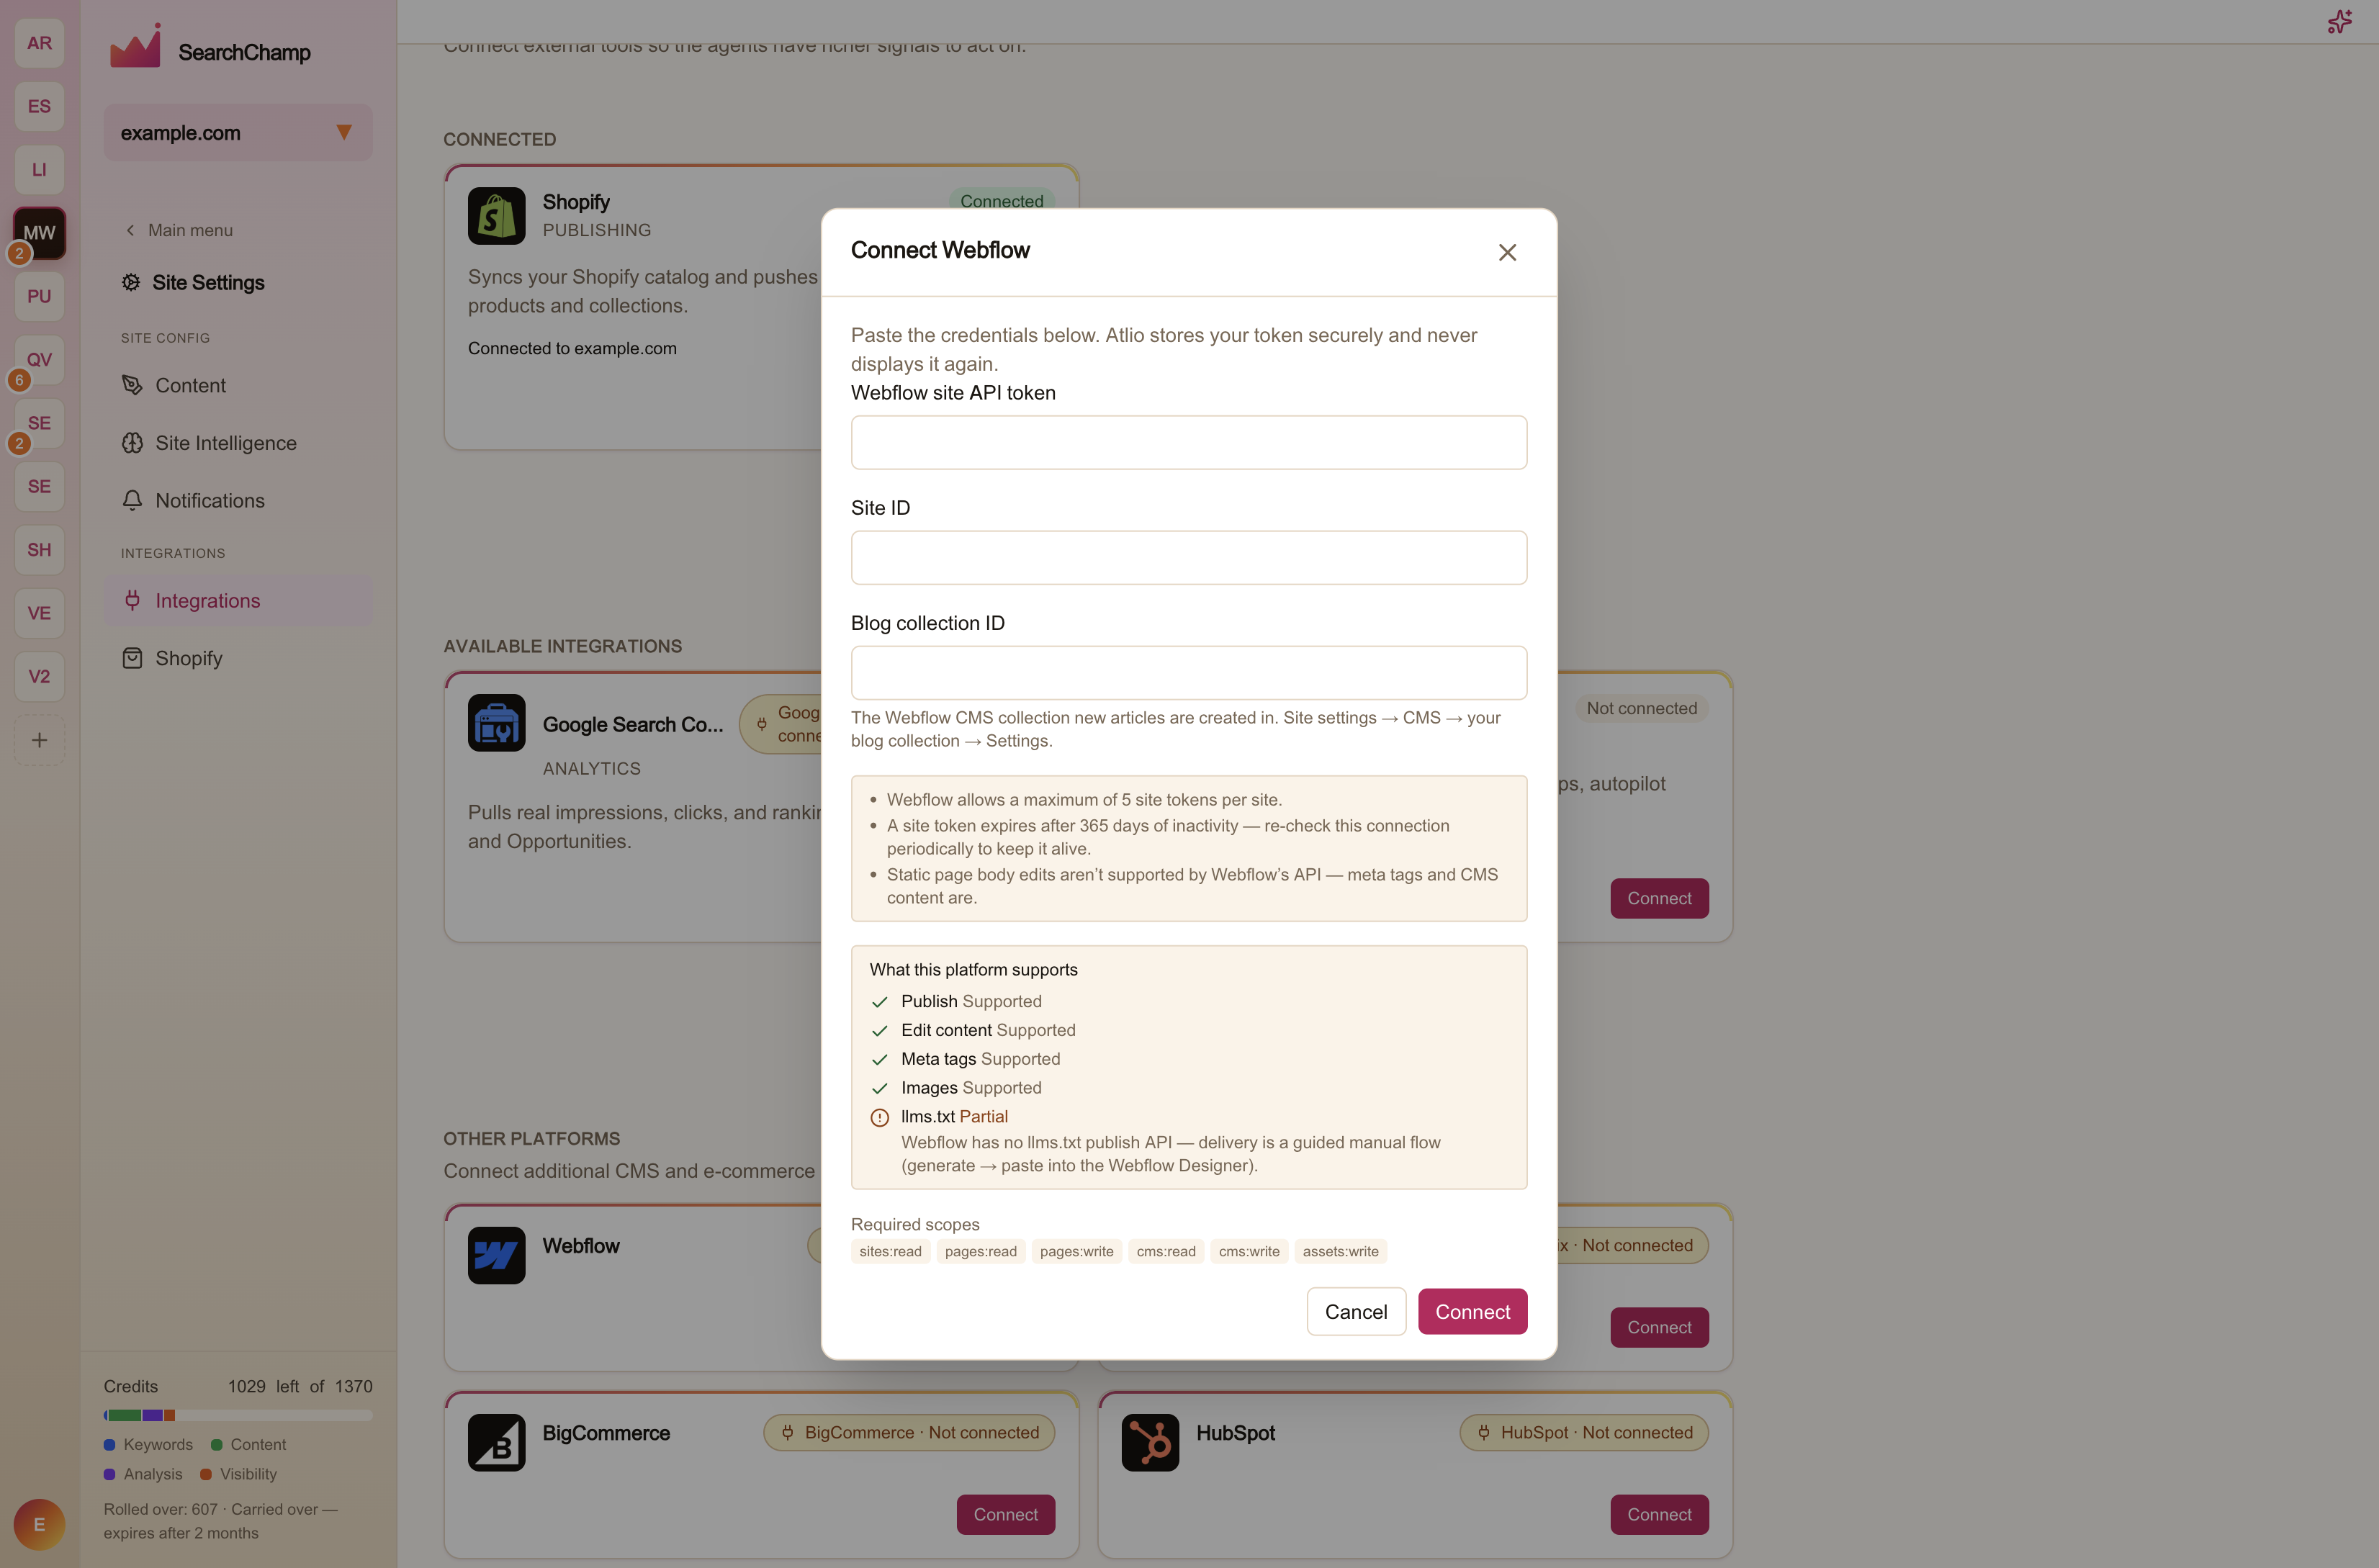
SearchChamp stores the token securely and never displays it again. Select Connect to save.
What Webflow supports
| Capability | Support |
|---|---|
| Publish | Supported |
| Edit content | Supported |
| Meta tags | Supported |
| Images | Supported |
| llms.txt | Partial — Webflow has no llms.txt publish API, so delivery is a guided manual flow (generate in SearchChamp, paste into the Webflow Designer) |
Static page body edits aren't supported by Webflow's API either. Meta tags and CMS content are.
Keeping the connection alive
Two Webflow limits worth knowing:
- Webflow allows a maximum of 5 site tokens per site.
- A site token expires after 365 days of inactivity. Re-check the connection periodically so it doesn't lapse quietly.